Fleet & Hangar
Your persistent aircraft, configurations, positions and operational capabilities — ready to support the next flight.
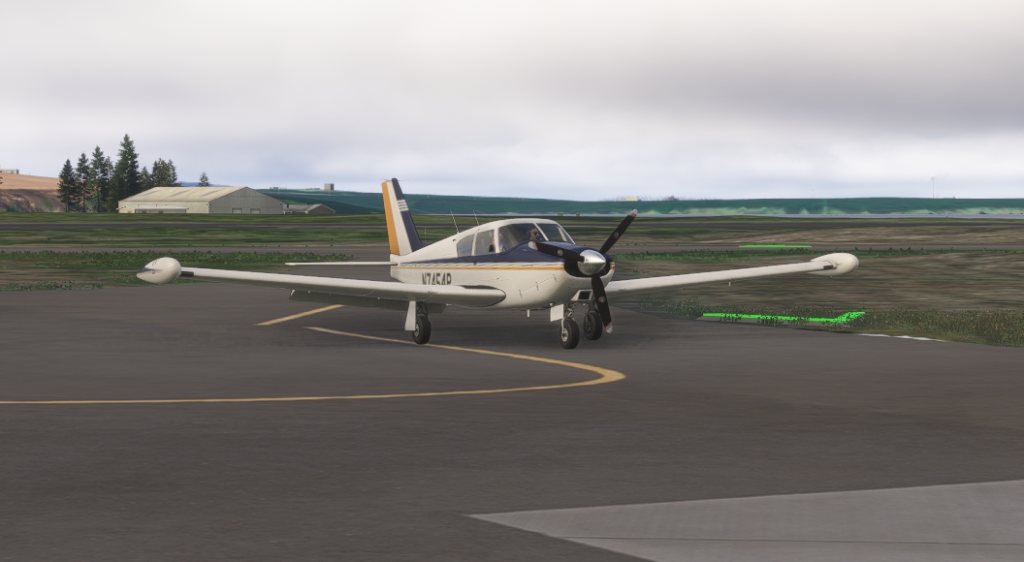
A2A Piper PA-24-250 Comanche
Every plottable sector recorded for this airframe. Flight Logger records use the actual stored breadcrumb where one exists; historical and other records use the known departure-to-destination sector only.
Manage declared aircraft0 declared · console / CoxBox / manual pilots
Complete route footprint
All history is shown by default. Filter the career, or click a route to inspect one sector closely.
Mapped sectors
| Date | Route | Source | Registration | Distance | Map | |
|---|---|---|---|---|---|---|
| September 13, 2026 | EGPO → EGEI | Flight Logger Recorded track | N7454P | 147.1 NM | Open → | |
| September 7, 2026 | EGPA → EGPO | Flight Logger Recorded track | N7454P | 121.8 NM | Open → | |
| September 7, 2026 | KPGA → UT30 | Flight Logger Recorded track | N7454P | 42.6 NM | Open → | |
| August 29, 2026 | EGPE → EGPA | Flight Logger Recorded track | BOP-356 | 120.9 NM | Open → | |
| August 27, 2026 | EGQG → EGPE | Flight Logger Recorded track | BOP-356 | 112.1 NM | Open → | |
| August 27, 2026 | EGPJ → EGQG | Flight Logger | BOP-356 | 82.0 NM | Open → | |
| August 27, 2026 | EGFL → EGFQ | Flight Logger | BOP-356 | 47.0 NM | Open → | |
| August 24, 2026 | EG3L → EGFQ | Historical Log | BOP-356 | 19.6 NM | Open → | |
| August 24, 2026 | EGFQ → EGPJ | Flight Logger | BOP-356 | 52.0 NM | Open → | |
| August 21, 2026 | KERI → KERI | Historical Log | BOP-356 | — | Open → | |
| June 1, 2026 | KROC → KERI | Historical Log | BOP-356 | — | Open → | |
| April 10, 2026 | KEWR → KEWR | Historical Log | N8590S | — | Open → | |
| March 31, 2026 | KCON → KEWR | Historical Log | N8590S | — | Open → | |
| March 31, 2026 | CON → KEWR | Historical Log | N8590S | 191.0 NM | Open → | |
| March 31, 2026 | KCON → CON | Historical Log | N8590S | — | Open → | |
| March 27, 2026 | EHAM → EHLE | Historical Log | BOP-356 | 0.4 NM | Open → | |
| March 27, 2026 | EHRD → EHAM | Historical Log | BOP-356 | 27.2 NM | Open → | |
| March 27, 2026 | 5127N00522E → EHRD | Historical Log | BOP-356 | 44.2 NM | Open → | |
| March 27, 2026 | EBOS → EHEH | Historical Log | BOP-356 | 41.7 NM | Open → | |
| March 27, 2026 | EBOS → EBOS | Historical Log | BOP-356 | 0.9 NM | Open → | |
| March 24, 2026 | EG29 → EGPL | Historical Log | 356 | 74.2 NM | Open → | |
| March 24, 2026 | 5719N00544W → 5719N00544W | Historical Log | 356 | — | Open → | |
| March 24, 2026 | EG29 → 5719N00544W | Historical Log | 356 | 3.7 NM | Open → | |
| March 23, 2026 | EGNE → EGNE | Historical Log | 356 | 42.7 NM | Open → | |
| March 20, 2026 | EGFE → EGBP | Historical Log | 356 | 116.8 NM | Open → | |
| March 7, 2026 | 04UT → KBCE | Historical Log | 356 | 86.5 NM | Open → | |
| March 7, 2026 | KPGA → 04UT | Historical Log | 356 | 40.1 NM | Open → | |
| March 7, 2026 | KPGA → KBCE | Historical Log | N1891U | 57.0 NM | Open → | |
| February 12, 2026 | CYSC → KCON | Historical Log | N8590S | 134.0 NM | Open → | |
| January 19, 2026 | KPQI → CYSC | Historical Log | N8590S | 169.0 NM | Open → | |
| January 18, 2026 | KHYA → KPQI | Historical Log | N8590S | 316.0 NM | Open → | |
| January 18, 2026 | KBHB → KHYA | Historical Log | N8590S | 186.0 NM | Open → | |
| January 9, 2026 | ME16 → KBHB | Historical Log | N8590S | 151.0 NM | Open → | |
| January 9, 2026 | CDT5 → ME16 | Historical Log | N8590S | 133.0 NM | Open → | |
| January 8, 2026 | ME16 → CDT5 | Historical Log | N8590S | 133.0 NM | Open → | |
| January 7, 2026 | CYQM → ME16 | Historical Log | N8590S | 141.0 NM | Open → | |
| January 7, 2026 | KBHB → CYQM | Historical Log | N8590S | 184.0 NM | Open → | |
| January 5, 2026 | KLEW → NH69 | Historical Log | Freelance | 41.0 NM | Open → | |
| January 5, 2026 | KBHB → KLEW | Historical Log | Freelance | 86.0 NM | Open → | |
| January 4, 2026 | KRKD → KBHB | Historical Log | Freelance | 39.0 NM | Open → | |
| January 3, 2026 | KIWI → KRKD | Historical Log | Freelance | 27.0 NM | Open → | |
| January 3, 2026 | KWVL → KIWI | Historical Log | Freelance | 34.0 NM | Open → | |
| January 3, 2026 | KBST → KWVL | Historical Log | Freelance | 29.0 NM | Open → | |
| January 2, 2026 | KBHB → KBST | Historical Log | Freelance | 27.0 NM | Open → | |
| January 2, 2026 | KMLT → KBHB | Historical Log | Freelance | 73.0 NM | Open → | |
| January 2, 2026 | CYTZ → CYTZ | Historical Log | 356 | — | Open → | |
| December 31, 2025 | KFVE → CYFC | Historical Log | 356 | 148.3 NM | Open → | |
| December 30, 2025 | EGBG → EGNX | Historical Log | Freelance | 17.0 NM | Open → | |
| December 30, 2025 | EGNX → EGBG | Historical Log | Freelance | 17.0 NM | Open → |
A2A Piper PA-24-250 Comanche
RFoV has recorded 66 sectors in this aircraft across 64 airports. Its story currently continues from EGEI.
Possible next chapters
RFoV uses this airframe’s recorded history plus the current suitable opportunity set to suggest where its story could go next.
Developer aircraft data
A2A Piper PA-24-250 Comanche
A2A Accu-Sim Comanche 250 (MSFS 2024) Validated Procedures · Validated · Exact aircraft match
Reference view of the developer-sourced Knowledge Pack. It shows the whole library without contextual filtering. Check marks are local to this browser and do not change the live Flight Companion state.
Preparation · 5
The Accu-Sim Comanche uses its own external simulation, so configure fuel and loading in the A2A tablet rather than the default MSFS weight-and-balance screen.
- Open the A2A Comanche tablet and select Fuel / Payload.
- Set main/tip-tank fuel, occupants and baggage for the planned simulator flight.
- Confirm the tablet shows total weight and centre of gravity inside the permitted envelope.
- Synchronise the EDM 830 fuel total from the tablet if you want its fuel-remaining calculations to match the loaded fuel.
The native 2024 Comanche moves walkaround actions out of the old tablet tab and into the MSFS 2024 avatar walkaround system.
- Exit the aircraft into MSFS 2024 avatar mode.
- Complete the available Comanche walkaround interactions around the airframe.
- Resolve any covers, chocks, tie-downs or inspection items that would prevent the simulated aircraft being ready for flight.
- Return to the cockpit only when the walkaround state is satisfactory.
A2A provides a simulated oil-pan heater that takes roughly two hours to warm the oil to about 75°F.
- If you want to preheat the simulated engine, connect the Engine Heater from the A2A tablet before start.
- Allow roughly two simulated/real-time hours for the oil to approach about 75°F.
- Disconnect/finish the heater setup before proceeding with the normal engine-start sequence.
Establish the documented safe start configuration before energising and cranking the engine.
- Complete the preflight and passenger briefing; secure seats and belts and remove the control lock.
- Set the parking brake and confirm the landing-gear switch is DOWN and flaps are UP.
- Switch radios, autopilot master, avionics master and other nonessential electrical switches OFF.
- Confirm circuit breakers are in and switch the rotating beacon ON.
A2A's realistic option models the Comanche parking-brake valve rather than the default click-toggle behaviour.
- Apply pressure with the toe brakes or hand brake.
- While brake pressure is applied, pull the parking-brake T-handle to trap the pressure.
- Confirm the aircraft remains held before releasing the brake pedals/hand lever.
Startup · 4
The normal start differs mainly in the amount of priming. The manual uses 40°F (about 4.4°C) as the warm/cold dividing point.
- Select the desired fuel tank; set mixture RICH, propeller FULL FORWARD and carburettor heat OFF.
- Crack the throttle about one-quarter inch.
- Switch the master ON, switch the electric fuel pump ON and verify fuel pressure, then switch the electric pump back OFF.
- If the engine is warm (over 40°F / 4.4°C), do not prime. If it is cold (under 40°F / 4.4°C), use about 3-5 primer strokes; extreme cold may require more.
- Set magnetos to BOTH, verify the propeller area is clear and engage the starter.
- As the engine starts, adjust the throttle to about 800 RPM and verify oil pressure promptly.
- If oil pressure is not indicated within about 30 seconds, stop the engine and investigate the simulated condition.
Current simulator departure temperature is below the manual's 40°F warm/cold threshold, so the cold-start branch is particularly relevant.
- After verifying electric-pump fuel pressure and switching the pump OFF, use about 3-5 primer strokes before cranking.
- In extreme cold, additional priming may be needed; avoid repeated unnecessary throttle pumping.
- After start, allow extra time for oil pressure to appear while still respecting the manual's stop-and-investigate guidance if pressure does not establish.
If the engine has been over-primed, A2A documents a clearing and reduced-prime retry rather than adding more fuel immediately.
- Turn the magnetos OFF.
- Open the throttle slowly and crank the engine through about ten revolutions to clear excess fuel.
- Re-prime using roughly half the amount used on the first attempt.
- Return magnetos to BOTH and repeat the normal starting procedure.
Use the A2A warm-up range and time guidance before high-power ground checks.
- Warm the engine at roughly 800-1200 RPM.
- Limit warm-up to about 2 minutes in warm weather or 4 minutes in cold weather.
- If alternator/generator output is needed, use about 1200 RPM while warming.
- Consider the engine ready for takeoff when the throttle can be opened without the engine faltering.
Taxi / Run-up · 2
Complete the A2A taxi setup before leaving the parking area.
- Confirm the primer is locked, then switch the avionics master ON and check the ammeter.
- Switch radios ON; set the transponder as required.
- Set the altimeter and heading indicator and verify the green landing-gear indication.
- Set navigation lights as required and release the parking brake.
- Test the brakes as soon as the aircraft begins to roll.
Use the documented engine, magneto, propeller and carburettor-heat checks before takeoff.
- Position into wind, hold the brakes, verify fuel quantity and select the desired tank.
- Set mixture as required and bring the engine to 2000 RPM.
- Check oil pressure, oil temperature, fuel pressure, ammeter, vacuum, CHT and EGT.
- Check each magneto: maximum drop 125 RPM and maximum difference 50 RPM.
- Cycle the propeller three times, then reduce to about 1500 RPM and confirm steady operation.
- Check carburettor heat operation briefly; avoid prolonged ground carb-heat use in dusty conditions.
Takeoff · 3
Set controls, fuel, engine and lighting for departure before entering the runway.
- Check flight controls FREE and CORRECT; set elevator trim NEUTRAL and rudder trim as required.
- Latch the door and set flaps as planned.
- Select the desired fuel tank and switch the electric fuel pump ON.
- Set mixture FULL RICH (or as required for altitude), propeller FULL FORWARD and carburettor heat OFF.
- Check engine gauges; set pitot heat as required; switch strobes ON and landing lights as required.
The checklist's 85 MPH rotation figure is a gross-weight/no-flap reference; the A2A explanation warns that a lighter/flapped aircraft may become airborne significantly earlier.
- Advance the throttle smoothly to full power and verify the airspeed indicator comes alive and engine indications remain normal.
- At maximum takeoff weight with no flap, use about 85 MPH as the rotation reference.
- At lighter weights or with flap selected, expect the aircraft to become light on the mains earlier; maintain appropriate back-pressure rather than forcing the nosewheel down.
- Once airborne and a runway landing is no longer practical after a power loss, retract the landing gear.
- Retract flaps as appropriate and establish the climb; use 105 MPH for best rate when that is the objective.
A2A documents different flap use for minimum-run and crosswind takeoffs.
- For a deliberately minimum takeoff run, use 18° (two-thirds) flap; A2A notes roughly a 20% reduction in takeoff run.
- For a crosswind takeoff, normally use no flap and hold the nosewheel down to a higher-than-normal takeoff speed.
- Once airborne in crosswind, establish the required crab, retract the gear and continue the climb.
Climb · 2
A2A's checklist deliberately keeps takeoff power and the electric fuel pump in use until the initial climb is established.
- Do not reduce takeoff power before about 1000 ft AGL.
- At about 1000 ft AGL, switch the electric fuel pump OFF.
- Set propeller speed to no more than 2400 RPM and use throttle as engine temperatures permit.
- Check CHT and lean the mixture as required for the climb.
The A2A manual distinguishes best-rate climb from a faster normal climb for visibility and cooling.
- For maximum rate near sea level, use about 105 MPH.
- Reduce the best-rate target by about 1 MPH per 1000 ft, reaching roughly 95 MPH at 10,000 ft.
- For a normal lower-altitude climb, 110-120 MPH provides more forward speed and cooling.
- Avoid extended climbs below about 95 MPH at low altitude because visibility and cooling are reduced.
Cruise · 4
Use the A2A recommended RPM range and select manifold pressure for the desired percentage power.
- Set throttle and propeller for the desired cruise power; A2A recommends roughly 2000-2400 RPM for 65-75% power at low/intermediate altitude.
- Lean the mixture as required; above 5000 ft the manual says it should always be leaned in cruise.
- Verify the electric fuel pump is OFF and fuel pressure is normal.
- Check the engine gauges and EDM 830 trends after the power/mixture setting stabilises.
The simulated EDM 830 includes an A2A-documented ROP LeanFind workflow.
- Establish a stable cruise at about 65-75% power and pre-lean to roughly 50°F rich of peak on any cylinder; allow the engine to stabilise.
- Press LF and confirm ROP mode.
- Lean continuously at about 5°F per second until LEANEST flashes and the leanest cylinder is identified.
- If needed, press LF again so the display shows the temperature difference from peak.
- Slowly enrich to the desired setting; A2A notes roughly 40-50°F ROP for best power.
A2A recommends alternating tanks to keep lateral trim balanced; if tip tanks are fitted, use them first.
- Monitor fuel quantity and fuel pressure during cruise.
- Alternate between left and right tanks periodically to maintain lateral balance.
- If tip tanks are installed, use the tip-tank fuel first as suggested by the manual.
The manual calls out roughly 20°F to 70°F (-5°C to 21°C) for occasional in-flight carb-heat checks.
- If conditions suggest carburettor icing, apply full carburettor heat rather than partial heat.
- Expect an initial RPM/manifold-pressure change and possible temporary roughness as ice clears.
- Once the ice is removed, return carburettor heat fully OFF rather than leaving partial heat selected.
Descent · 2
A2A does not publish a separate normal-descent checklist, but its approach guidance gives clear recommended speeds for gear and flap extension.
- Plan the descent so normal landing-gear extension can be made below about 125 MPH; although the gear may remain extended to 150 MPH, A2A recommends the lower speed to reduce loads on the motor and doors.
- Plan flap extension below about 100 MPH where practical; 125 MPH is the maximum flap-extended speed.
- Transition to the documented Approach checklist before entering the final landing configuration.
A2A lists these actions in its Approach checklist; RFoV surfaces the non-landing-configuration portion one phase earlier so the low-level Approach phase is not overloaded.
- When operationally appropriate in the descent, switch the electric fuel pump ON.
- Select the desired fuel tank and check fuel levels and fuel pressure.
- Set mixture RICH for the approach; for an airport above 4000 ft, lean as required instead of forcing full rich.
- Leave the actual landing configuration — propeller full forward, gear, flaps and final G.U.M.P. — for the Approach phase.
Approach · 2
With the early fuel/mixture actions already surfaced in Descent, Approach now concentrates on the configuration that should be completed nearer the airport.
- Verify the descent/pre-approach fuel and mixture setup is complete: fuel pump ON, desired tank selected, fuel pressure checked and mixture appropriate for field elevation.
- Switch the autopilot master OFF.
- Set the propeller FULL FORWARD and carburettor heat as required.
- Reduce toward about 120 MPH and extend the landing gear when within the appropriate speed range.
- Select flaps as desired within their speed limits.
- Complete a final G.U.M.P. check before landing.
A2A gives different normal final references for full-flap and no-flap approaches.
- With 27° full flap, trim for about 90 MPH on final.
- With no flap, use about 95 MPH on final.
- Keep the propeller FULL FORWARD to support an immediate go-around if needed.
- In stronger winds, use flap and speed appropriate to the conditions rather than forcing the full-flap reference.
Landing · 2
The short-form landing checklist uses full flap and about 90 MPH, with an allowance for windy conditions.
- Confirm the landing-gear indicator is GREEN before touchdown.
- Set flaps DOWN as planned.
- For a normal full-flap landing, target about 90 MPH on final.
- In windy conditions, use flap as required and the checklist allows about 5 MPH additional approach speed.
- Touch down at the lowest practical speed consistent with the simulated conditions.
A2A notes that carburettor heat should be moved OFF immediately if a landing is aborted and full power is required.
- If going around with carburettor heat selected, move carburettor heat fully OFF.
- Use the already-set FULL FORWARD propeller position and apply the required power.
- Reconfigure gear/flaps only as the go-around is established.
After Landing · 1
Complete the A2A after-landing cleanup after clearing the runway.
- Raise the flaps.
- Switch strobes OFF.
- Switch the electric fuel pump OFF.
- Lean the mixture as required for taxi.
- Return trim to NEUTRAL.
Parking · 1
Once parked, secure the aircraft before carrying out the shutdown sequence.
- Bring the aircraft to a complete stop and set the parking brake.
- If A2A's Realistic Parking Brake option is enabled, apply brake pressure while pulling the parking-brake handle.
- Confirm the aircraft is stable and clear before switching off avionics and engine systems.
Shutdown · 1
Follow the A2A shutdown order and finish by securing the simulated airframe.
- Switch radios OFF, set the transponder OFF and switch the avionics master OFF.
- Switch the master OFF, close the throttle and move the mixture to IDLE CUTOFF to stop the engine.
- Turn the magnetos OFF.
- Secure the control wheel and close the doors/windows.
- Fit tie-downs/chocks as appropriate to the simulated parking state.