Fleet & Hangar
Your persistent aircraft, configurations, positions and operational capabilities — ready to support the next flight.
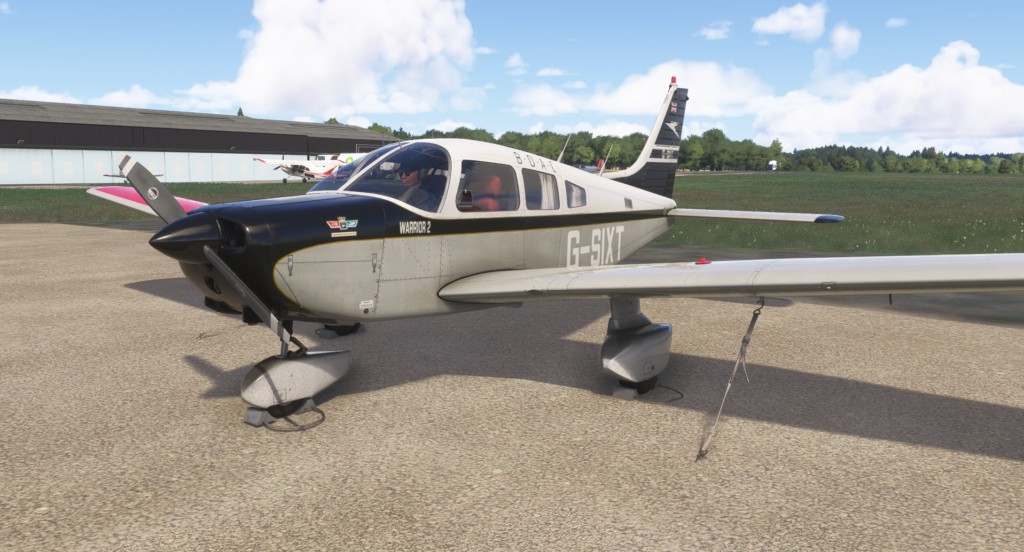
Just Flight PA28 Warrior II
Every plottable sector recorded for this airframe. Flight Logger records use the actual stored breadcrumb where one exists; historical and other records use the known departure-to-destination sector only.
Manage declared aircraft0 declared · console / CoxBox / manual pilots
Complete route footprint
All history is shown by default. Filter the career, or click a route to inspect one sector closely.
Mapped sectors
| Date | Route | Source | Registration | Distance | Map | |
|---|---|---|---|---|---|---|
| September 3, 2026 | LEMG → GMTT | Flight Logger Recorded track | G-SIXT | 124.3 NM | Open → | |
| August 30, 2026 | EGSZ → EGLC | Flight Logger Recorded track | G-SIXT | 94.5 NM | Open → | |
| August 29, 2026 | EGSZ → EGSZ | Flight Logger Recorded track | G-SIXT | 3.9 NM | Open → | |
| August 28, 2026 | EGOA → EGSZ | Flight Logger Recorded track | G-SIXT | 24.2 NM | Open → | |
| August 28, 2026 | EGTF → EGOA | Flight Logger Recorded track | G-SIXT | 84.0 NM | Open → |
Just Flight PA28 Warrior II G-SIXT
Piper PA-28-161 Warrior II Detailed Normal Procedures · Validated · Pattern match
Reference view of the developer-sourced Knowledge Pack. It shows the whole library without contextual filtering. Check marks are local to this browser and do not change the live Flight Companion state.
Preparation · 4
Establish a known safe cockpit state before inspecting the aircraft.
- Release the control wheel restraint/belts and leave avionics switched off.
- Use the master switch briefly to check fuel quantity indications, then switch it back off.
- Confirm ignition/magnetos are off before going outside.
Walk around the aircraft and confirm the exterior is clean, unobstructed and ready for the simulated flight.
- Inspect the exterior and control surfaces/hinges for damage or interference.
- Confirm wings and control surfaces are free of ice, snow or frost.
- Remove the pitot cover and confirm pitot/static openings and air inlets are clear.
- Check windshield, propeller/spinner and cowling condition.
Verify the consumables and visible ground-contact components before boarding.
- Check fuel supply/quantity, visually secure caps, drain fuel sumps and confirm vents are open.
- Check oil level and look for visible fuel/oil leaks.
- Check tyres, brakes and main/nose gear strut condition.
Finish the preflight with the cabin arranged for flight.
- Secure baggage and baggage door.
- Confirm primary controls operate correctly.
- Close and secure the cabin door.
- Adjust seats and fasten/adjust belts and harnesses.
Startup · 5
Set the basic fuel/air/electrical state before cranking.
- Brakes set.
- Carburettor heat fully OFF.
- Select the desired fuel tank.
- Radios/avionics OFF for start.
When the simulator context suggests a cold start, use the Piper cold-start sequence rather than a generic start.
- Open the throttle slightly, about a quarter inch.
- Set the master switch ON.
- Set the electric fuel pump ON.
- Set the mixture FULL RICH.
- Engage the starter.
- When the engine fires, adjust the throttle to a stable idle/warm-up setting.
- Confirm oil pressure promptly after start.
- If it has not started after about 10 seconds of cranking, stop and use the documented prime/retry approach rather than continuous cranking.
For a warm engine, use the documented hot-start setup instead of merely repeating the cold-start sequence.
- Open the throttle about half an inch.
- Set the master switch ON.
- Set the electric fuel pump ON.
- Set the mixture FULL RICH.
- Engage the starter.
- When the engine fires, adjust the throttle to a stable idle/warm-up setting.
- Confirm oil pressure after start.
If the simulated engine is flooded, use the separate Piper recovery sequence rather than adding more fuel.
- Open the throttle fully.
- Set the master switch ON.
- Set the electric fuel pump OFF.
- Set the mixture to IDLE CUT-OFF.
- Engage the starter.
- As the engine catches, progressively enrich the mixture while reducing throttle.
- Confirm oil pressure once the engine is running.
Do not go directly from start to run-up; stabilise the engine in the documented warm-up range.
- Set approximately 800–1200 RPM for warm-up.
- Wait for stable indications before taxi/run-up.
Taxi / Run-up · 2
Confirm the aircraft can move and stop normally before continuing to the run-up point.
- Confirm chocks are removed and the taxi area is clear.
- Apply throttle smoothly.
- Check brakes early in the taxi.
- Check steering/directional control.
Use the documented run-up values and indications before departure.
- Set about 2000 RPM for the run-up.
- Check magnetos: maximum single drop about 175 RPM and maximum left/right difference about 50 RPM.
- Check vacuum indication around 5.0 inHg and verify oil temperature/oil pressure are normal.
- Air conditioning OFF; press-to-test the annunciator panel; check carburettor heat operation.
- Confirm the engine accepts throttle without faltering, then electric fuel pump OFF and check fuel pressure.
- Return the throttle toward idle after the checks.
Takeoff · 3
Set the Warrior into a known departure configuration before entering the runway.
- Master switch ON; flight instruments checked; proper fuel tank selected.
- Electric fuel pump ON; engine gauges checked; carburettor heat OFF.
- Seat backs upright; mixture set; primer locked.
- Belts/harnesses fastened and adjusted; empty-seat belts snug.
- Set flaps and trim for the chosen takeoff; controls free and correct.
- Doors latched; air conditioner OFF.
For a normal departure, use the Piper normal takeoff profile rather than a generic rotation cue.
- Set flaps/trim as planned and align on the runway.
- Accelerate through roughly 45–55 KIAS.
- Apply smooth back pressure to rotate into the climb attitude.
- Transition to the selected climb speed once airborne.
The supplied POH has distinct short-field and soft-field procedures; select one only when it matches the simulated runway/mission.
- Short-field with obstacle: use 25° flap, lift/climb at about 52 KIAS until clear, then accelerate toward 79 KIAS and retract flaps gradually.
- Short-field without obstacle: flaps up, rotate around 50 KIAS, then accelerate toward the 79 KIAS best-rate climb.
- Soft-field: use 25° flap, lift off as early as practical, remain in ground effect while accelerating, then establish the appropriate climb and retract flaps gradually.
Climb · 1
Use the documented climb target that matches the situation.
- Best-rate climb (flaps up): about 79 KIAS.
- Best-angle climb (flaps up): about 63 KIAS.
- En-route climb: about 87 KIAS.
- Once established at the desired altitude, manage the electric fuel pump in accordance with the normal procedure.
Cruise · 1
Transition from climb to the Warrior normal cruise configuration.
- Use the aircraft performance data to choose the cruise power setting.
- Treat approximately 75% as the normal maximum cruise-power reference from the supplied material.
- Set power from the applicable table and adjust mixture for the chosen cruise condition.
- Continue monitoring engine and fuel indications.
Descent · 2
Use the documented normal-descent reference as the starting point, then adapt to the simulated arrival.
- Set roughly 2500 RPM for the normal descent reference.
- Use about 126 KIAS as the documented normal-descent airspeed reference.
- Mixture RICH and carburettor heat ON when required.
If deliberately using a power-off descent, use the separate Piper guidance rather than treating it like the normal descent.
- Carburettor heat ON when required; throttle closed.
- Choose airspeed and mixture as appropriate to the simulated situation.
- Periodically verify power availability rather than leaving the engine at prolonged idle without checks.
Approach · 1
Complete the documented landing setup before final approach.
- Select the proper fuel tank and bring seat backs upright.
- Fasten/adjust belts and harnesses.
- Electric fuel pump ON and mixture set.
- Set flaps only within the documented flap-extension speed limit (103 KIAS maximum).
- Air conditioner OFF and trim for the approach.
Landing · 1
Use the supplied landing reference once configured and stable.
- With full landing flap (40°), use about 63 KIAS as the documented final-approach reference.
- Confirm the runway and landing configuration remain suitable before touchdown.
After Landing · 1
The supplied pages do not define a separate After Landing checklist, so RFoV keeps this step deliberately high-level.
- Clear the runway before reconfiguring.
- Return to a normal taxi configuration and continue monitoring brakes/steering.
- Prepare the aircraft for the documented stopping-engine sequence once parked.
Parking · 1
Once stopped, use the Piper parking items before leaving the simulator aircraft.
- Parking brake SET.
- Secure the control wheel using the belts/restraint.
- Flaps fully UP.
- Place wheel chocks and secure tie-downs when modelling those ground actions.
Shutdown · 1
Use the documented shutdown order rather than a generic “engine off” prompt.
- Retract flaps and switch electric fuel pump OFF.
- Air conditioner and radios/avionics OFF.
- Throttle fully aft/idle.
- Mixture to IDLE CUT-OFF and allow the engine to stop.
- Magnetos/ignition OFF, then master switch OFF.